Bluehost Web Hosting Help
How To Use SSH on Windows PuTTY - Generate Public/Private Key Pair & File
Summary
Using a Public/Private key to authenticate when logging into SSH can provide added convenience or added security. The Public/Private key can be used in place of a password so that no username/password is required to connect to the server via SSH. Instead the unique public and private key provide the secure authentication. The keys may also be generated with a different password from your cpanel password if desired.
Generate a Public/Private Key Pair
- In the Bluehost cPanel click on the SSH/Shell Access icon under the Security category.
- Open the Manage SSH Keys tool.
- Click Generate a New Key and complete the fields shown. We recommend the RSA key type and a 4096 bit key size for maximum security.
Note: There is bug in cPanel at this time that does not allow you to create a 2048 or 4096 bit DSA key - The location of the newly generated public and private key will be shown as well as the key fingerprint.
- Click Go Back.
- Next to the Public Key you generated, click Manage Authorization then click Authorize to activate this public key.
- Click Go Back.
- To the right of the Private Key, click on View/Download. Then click the Download Key button. Save the file to your computer and click go back.
Generate a ppk file
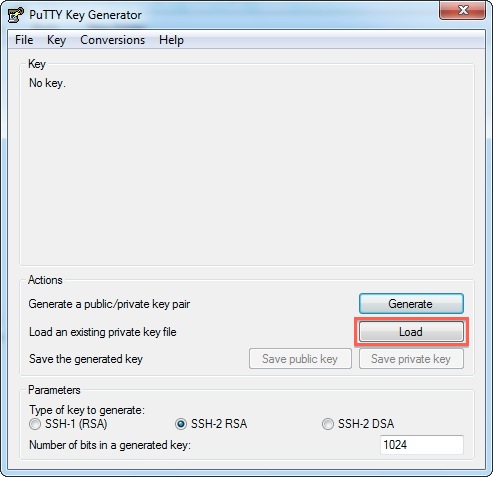
- Download and open PuTTYgen from the PuTTY Download Page
- Click Load
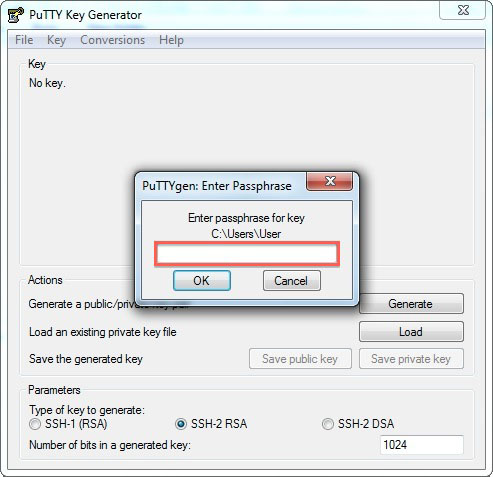
- Locate the private SSH key that you have downloaded. Note: You will need choose to display All Files* from the menu to the right of the File Name field.
- Enter the password for your SSH Key
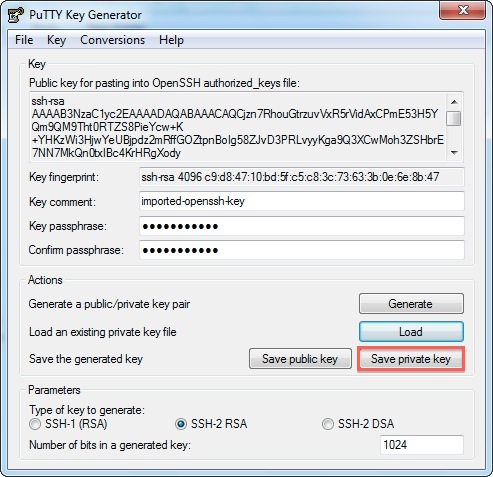
- Click the Save private key button to create the ppk file.
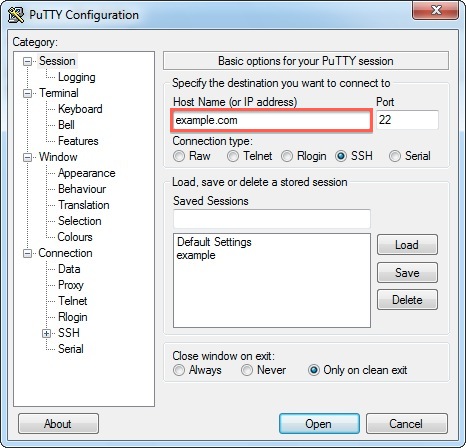
Configuring PuTTY
- In PuTTY, under Session, enter your Host Name
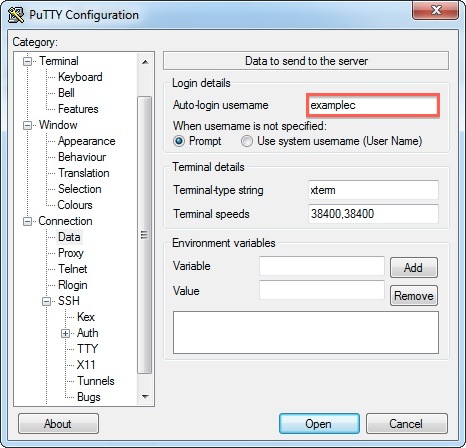
- Under Connection choose Data
- Enter your cPanel username as the Auto-login username
- Under SSH, choose 2 from Preferred SSH Protocol Version
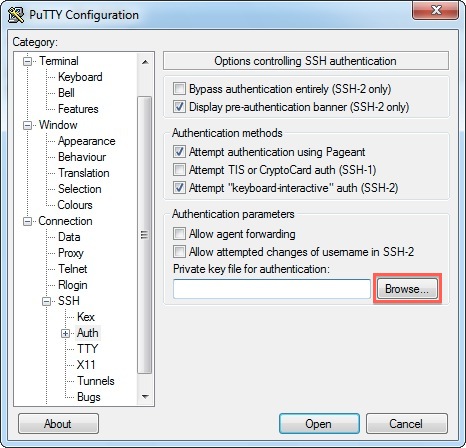
- Under SSH -> Auth, you will need to specify where your private key can be found. Remember this is where you saved the private key on your local computer. Click Browse to locate the file on your computer.
- Under Sessions, type a name (such as "my site") in the Saved Sessions box and click Save.
 601,588 views
 bookmark
 share
share
 E-mail
 Twitter
 Google Bookmarks
 Facebook
 MySpace
 Digg
Digg Reddit
 Delicious
 LinkedIn
 StumbleUpon
 tags:
tags: Recommended Help Content
SSH Access - Generating a Public/Private Key
How to generate and use SSH Keys
What Are SSH Connections - How To Edit In PuTTY, Mac, & Linux
What is SSH and how do I setup secure connections.
Generate a GPG/PGP key using SSH
I would like to know how to create a new gpg key using SSH access.
Related Help Content
CentOS 7 and cPanel Upgrades
VPS and Dedicated customers with servers running the CentOS 6 operating system will not be able to upgrade cPanel past version 86. The cPanel team will still support CentOS 6 with cPanel 86 until March 31st, 2021.
Check Backup Dates Using SSH on Dedi/VPS
This article will explain how to check the dates of your backups using SSH.
File Manager - How to Upload Files
This article will walk you through uploading files using the File Manager
Using SSH to View the Mail Queue on Dedicated or VPS
This article will explain how to view the outgoing email queue or exim queue in SSH.
How To Create A New cPanel in WHM - cPanel Setup
How to create a new cPanel.
SSH Access
Is SSH/Shell access enabled by default?
Public IP Address and How To Find it
What is a Public IP Address?
File Manager - How to Create, Remove, and Edit Files
This article will walk you through creating, removing, and editing files with the file manager.