Bluehost Web Hosting Help
VPS or Dedicated Hosting - cPHulk Brute Force Protection
Overview
This article will cover the use of cPHulk. cPhulk is software designed to protect your server from brute force login attempts. It does this through blacklisting IP addresses that have too many failed login attempts within a short period.
ATTENTION: When enabling cPHulk it is critical that you whitelist your own IP address so that you do not block yourself from your server. If you believe you have been blocked from your server please refer to the Whitelisting in cPanel section.
Note: If you need your IP address, it can be found at www.Bluehost.com/ip
Tasks Involved
Click on any of the tasks to jump to that point in the guide.
Enable cPhulk
To enable, cPHulk follow these steps.
- Log in to WHM.
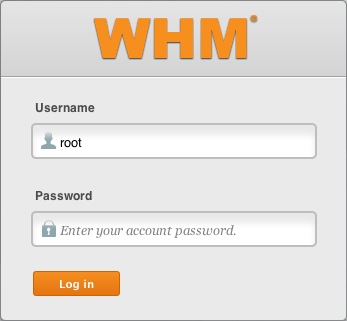
The WHM login - Click on Security Center.

The WHM Security Center - Click on the cPHulk Brute Force Protection icon.
The cPhulk link. - Click on Enable under cPHulk is Currently Disabled.

The Enable Link.


The status should say cPHulk is Currently Enabled.
Whitelisting Your IP Address
These steps will explain how to whitelist an IP address. Whitelisted IP addresses will never be blocked by cPHulk.
- Click the White/Black list Management tab.

White/Black list Management - Enter your IP address in the White list (Trusted IP list) entry field.
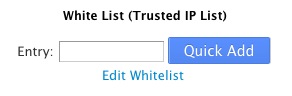
Whitelist Entry - Click Quick Add.


To modify multiple IPs at once, click Edit Whitelist
Whitelisting in cPanel
If you have been blocked from WHM or any other login on your server, you may still login to your Bluehost cPanel and whitelist your IP address.
Note: If you need your IP address, it can be found at www.Bluehost.com/ip
- Login to your Bluehost cPanel
- If you are not already on the hosting page, click the hosting link at the top.
- Click the performance link underneath the hosting tab.
- Click the system console link.
-
Login with root as your username and your root password.
Note: If you aren't sure of the root password please see: Setting your Root password
Note: When typing in the password, the console will not act as if anything is being entered. This is done purposefully for security. Type your password carefully and hit enter as normal. -
Once you are logged into the console, run enter this command:
/scripts/cphulkdwhitelist YOUR-IP
Note: Please replace YOUR-IP with your actual IP address. -
Next run this command:
mysql cphulkd -e "delete from brutes where ip='YOUR-IP'"
Note: Please replace YOUR-IP with your actual IP address. -
Your IP address should now be whitelisted. Finally, enter this command to close the console.
exit
Blacklisting IP Addresses
- Click the White/Black list Management tab.
White/Black list Management - Enter the IP address into the Black list (Rejected IP list) entry field.
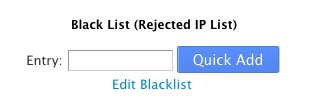
Blacklist Entry - Click Quick Add.

To modify multiple IPs at once, click Edit Blacklist.
 136,864 views
 bookmark
 share
share
 E-mail
 Twitter
 Google Bookmarks
 Facebook
 MySpace
 Digg
Digg Reddit
 Delicious
 LinkedIn
 StumbleUpon
 tags:
tags: Recommended Help Content
VPS and Dedicated Hosting: Restore or Transfer cPanel
If you need to transfer or restore a cPanel account for your VPS or Dedicated server, there is a tool within the WHM panel to perform these tasks. This article is about transferring or restoring from another server or restoring after a re-image.
VPS and Dedicated Hosting: ConfigServer Security and Firewall
CSF is a firewall for VPS and Dedicated servers. CSF is not installed as part of our default images on VPS or Dedicated servers. This article describes how to install it yourself or request support do so.
Securing a Dedicated or VPS Server
This article discusses some measures you can take to secure a Dedicated or VPS server
Related Help Content
VPS and Dedicated Hosting: Enabling FTP on New Servers
This article will explain how-to enable FTP on a newly provisioned VPS or Dedicated cPanel server. Since FTP is an unsecured connection point to the server, cPanel has it disabled by default in version 11.86 or prior.
VPS and Dedicated Hosting: Third Party Applications
VPS and Dedicated servers come with all applications necessary to run a standard web and email server. The applications that come with the VPS and Dedicated servers are generally supported as-is by our support technicians.
CentOS 7 and cPanel Upgrades
VPS and Dedicated customers with servers running the CentOS 6 operating system will not be able to upgrade cPanel past version 86. The cPanel team will still support CentOS 6 with cPanel 86 until March 31st, 2021.
VPS or Dedicated Hosting - Install ClamAV
How to install ClamAV to help with virus protection.
VPS or Dedicated Hosting - Installing Java
How to install Java in a dedicated server.
VPS or Dedicated Hosting - Installing Git
This is a tutorial on how to install Git onto the server.
Hotlink Protection
I need to protect the /images folder to not show images when people type in the correct URL like www.mydomain.com/images/ to protect from prying eyes.
VPS Dedicated Installing SSL
To help with installing an SSL certificate for an account on a dedicated server through the WHM